Flask Api Methods and Models Team Teach
January 2024 (1889 Words, 11 Minutes)
Flask API Methods and Model Updates
This is an explanation on how to connect the frontend to the backend api to make a functional login and sign up page
JWTs
JWT (JSON Web Token) is a way to share information securely between different parts of a web application. It’s like a message with three parts: a header (information about how the message is secured), a payload (actual data), and a signature (to make sure the message hasn’t been tampered with).
-
JWTs are secure due to their use of a signature for data integrity and authentication, ensuring that only authorized parties with the correct secret key can generate and verify the tokens. Additionally, their compact and stateless nature, along with standardized practices, contribute to their security in various web application scenarios.
-
Watch Payload: Be careful about what you put in the payload. It’s like a postcard - anyone can read it. Don’t put super-secret stuff there unless the whole message is encrypted.
Frontend Methods for Login/Signup:
- GET: Asks for data(useful for displaying the users)
- POST: Sends data to be saved which is primarily what we use for logins and sign ups
- PUT: Updates existing data(useful for updating passwords)
- Delete: Deletes data(Useful for deleting accounts)
These methods help the frontend (what you see on a website) talk to the backend (where data is stored). They’re like different actions – asking for info, saving new info, changing existing info, or deleting something.
How do Frontend and Backend work?
Frontend is responsible for the visual elements users interact with, using languages like HTML, CSS, and JavaScript. Backend manages server-side operations, handling data processing and application logic with languages like Python or Node.js. They collaborate to create a complete web application, with the frontend sending requests to the backend for data and functionality.

Login Page
This is some python code that we can put into the user.py api to add a login feature
- This works by searching the database for the provided username and password
- Would be part of the Backend Code in your user.py file
class Login(Resource):
        def post(self):
            data = request.get_json()

            uid = data.get('uid')
            password = data.get('password')

            if not uid or not password:
                response = {'message': 'Invalid creds'}
                return make_response(jsonify(response), 401)
#~~~~~~~~~~~~~~~~~~~~~~~~~~~~~~~~~~~~~~~~~~~~~~~~~~~~~~~~~~
            user = User.query.filter_by(_uid=uid).first()

            if user and user.is_password(password):
                response = {
                    'message': 'Logged in successfully',
                    'user': {
                        'name': user.name,
                        'id': user.id
                    }
                }
                return make_response(jsonify(response), 200)
#~~~~~~~~~~~~~~~~~~~~~~~~~~~~~~~~~~~~~~~~~~~~~~~~~~~~~~~~~~
            response = {'message': 'Invalid id or pass'}
            return make_response(jsonify(response), 401)

api.add_resource(Login, '/login')
API Security for Logging In
- Request Data Validation (Lines 5-10):
- The code extracts user input (uid and password) from the JSON data received in the POST request.
- It checks if both uid and password are present in the request. If either is missing, it returns a 401 error.
- The 401 (Unauthorized) status code indicates that the request has not been applied because it lacks valid authentication credentials for the target resource
- User Authentication (Lines 12-18):
- The code searches the database for a user with the provided uid.
- If a user is found and the provided password matches the stored password using user.is_password(password), it indicates successful authentication.
- The response includes a 200 OK status along with a message indicating successful login and some user details.
- The HTTP 200 OK success status response code indicates that the request has succeeded.
-
- This code snippet focuses on validating user input, authenticating users against stored credentials, and providing appropriate responses based on the authentication status.
- It utilizes HTTP status codes (401 for unauthorized) and JSON responses to communicate the outcome of the login attempt.
Now lets make a login form with HTML and Javascript
- You can style this with Saas
- The username toby with the password 123toby should be an account already
- Make sure to open the console by opening developer tools so you can see the logs
%%HTML
<div id="login">
    <p><label>
        User ID:
        <input type="text" name="uid" id="uid" required>
    </label></p>
    <p><label>
        Password:
        <input type="password" name="password" id="password" required>
    </label></p>
    <p>
        <button class="button" type="submit">Log in</button>
    </p>
</div>
<script>
    document.getElementById('login').addEventListener('submit', function(event) {
             event.preventDefault();
             const uid = document.getElementById('uid').value;
             const password = document.getElementById('password').value;
             const loginData = {
                 uid: uid,
                 password: password
             };
             fetch('http://127.0.0.1:8086/api/users/login', { // use your own port please
                 method: 'POST',
                 headers: {
                     'Content-Type': 'application/json'
                 },
                 body: JSON.stringify(loginData)
             })
             .then(response => {
                 if (response.ok) {
                     return response.json();
                 } else {
                     if (response.status === 401) {
                         throw new Error('Wrong username or password. Please retype.');
                     } else if (response.status === 404) {
                         throw new Error('Username or password not found. Please register first.');
                     } else {
                         throw new Error('Login failed');
                     }
                 }
             })
             .then(data => {
                 console.log('it worked!');
             })
             .catch(error => {
                 console.error('Error:', error.message);
                 alert(error.message);
             });
         });
     </script>
Sign up page
Now we need to be able to add users to the database
- This works by adding sql into the database
POST method for creating users
class _Create(Resource):
        def post(self):
            body = request.get_json()
            name = body.get('name')
            uid = body.get('uid')
            password = body.get('password')
            if uid is not None:
                new_user = User(name=name, uid=uid, password=password)
            user = new_user.create()
            if user:
                return user.read()
            return {'uid is possibly a dupe'}, 400
 api.add_resource(_Create, '/create')
Making a sign up page with HTML and JavaScript to add accounts
%%HTML
<div id="signup">
  <p><label>
      Name:
      <input type="text" name="name" id="name" required>
  </label></p>
  <p><label>
      User ID:
      <input type="text" name="uid" id="uid" required>
  </label></p>
  <p><label>
      Password:
      <input type="password" name="password" id="password" required>
  </label></p>
  <p>
      <button class="button" type="submit" onclick="signup()" >Sign Up</button>
  </p>
</div>

<script>
  function signup() {
       var name = document.getElementById('name').value;
       var uid = document.getElementById('uid').value;
       var password = document.getElementById('password').value;
       var requestBody = {
           name: name,
           uid: uid,
           password: password
       };
       fetch('http://localhost:8086/api/users/create', { //use your own port
           method: 'POST',
           headers: {
               'Content-Type': 'application/json',
           },
           body: JSON.stringify(requestBody),
       })
       .then(response => response.json())
       .then(data => {
           console.log('Sign Up successful:', data);
           window.location.href = "/student2/login";
       })
       .catch(error => {
           console.error('Error:', error);
       });
   }
</script>
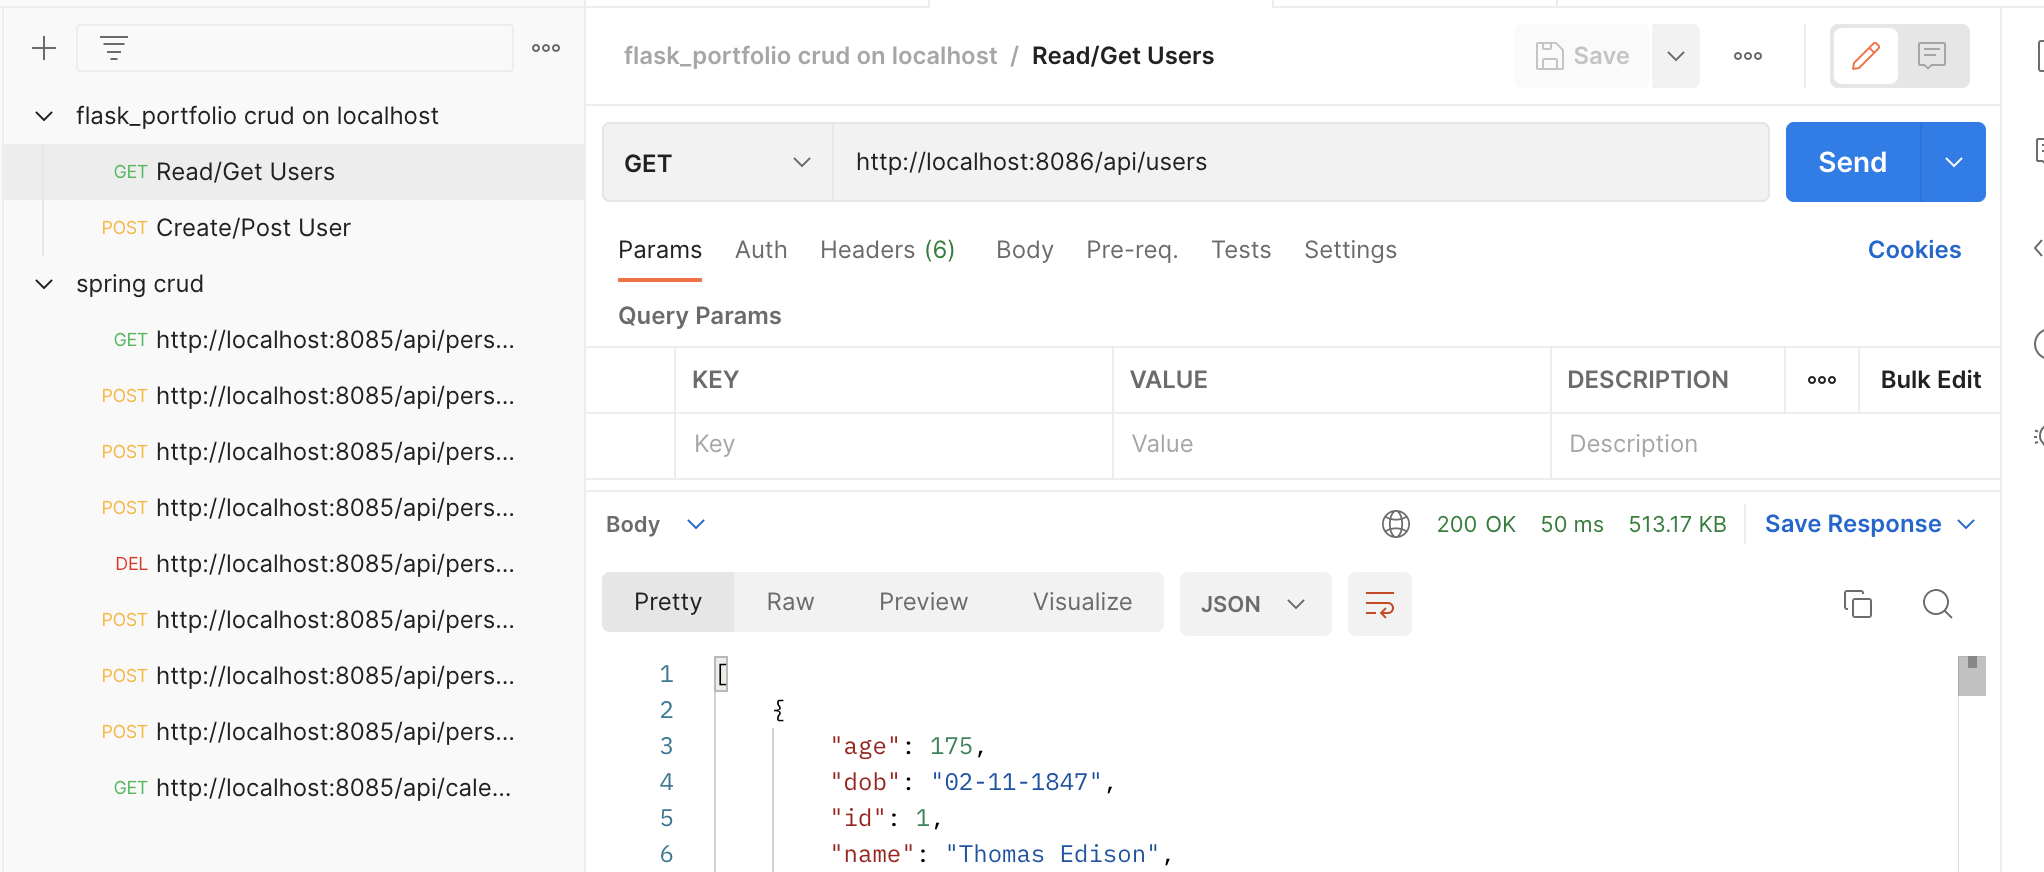
Postman (Testing)
- Browers can only be uesd for testing GET API’s but if you want to test other API methrods like POST, UPDATE, DELETE a tool like PostMan is a solution.
- Tests can be saved.
Steps for Usage
- Run your main.py file in Vscode and get the local link (Ex: http://192.168.1.75:8086/) then plug into PostMan
GETTING EXAMPLE
POSTING EXAMPLE
